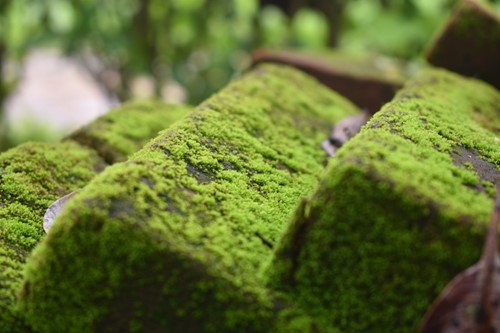
Moss graffiti, also called green graffiti or eco-graffiti, has become a popular trend both with artists and environmentally conscious individuals. Many graffiti artists are choosing to create living art instead of using spray paint and other materials with VOCs and other substances that can harm the local environment. While you might see moss graffiti in urban public spaces, it’s simple enough to make in your own home. Here are the steps to making your very own moss graffiti work of art.
Clumps of fresh moss
2 cups of buttermilk or yogurt (vegan yogurt works as well)
2 cups of water
1/2 tsp of sugar
Corn syrup (optional, but helpful if the mixture needs thickening)
Blender or food processor
Paint brush
Stencil, painter’s tape or anything you need to create your design
Moss graffiti is a flexible artistic medium. Even though it is living organic matter, it does not require the same care as your favorite houseplants or your garden. Some moss can live either in full sun while some prefer shade. If you gathered moss yourself, note the environment where it was growing and try to mimic the conditions. Moss is incredibly drought tolerant once it’s established and won’t need regular watering.
You can use moss graffiti on your walls or other surfaces indoors and out. For indoor art, try painting on a canvas or wood panel you can move around the home as needed. It’s easy to remove the moss once it grows, but you will need to start over from scratch. Otherwise, concrete, brick or stone work best.
Remember to only paint moss on walls you own, as most local laws consider it graffiti even if it isn’t paint.
First, wash your moss carefully. Try to rinse off as much soil from the roots as possible.
Crush the moss into small pieces and put it in the blender or food processor.
Add buttermilk/yogurt, water and sugar.
Blend the mixture into a smooth paste. If it is too thin, add a dash of corn syrup to thicken it. You want it to be thick enough that it does not immediately drip off of your paintbrush.
Prepare the surface for your art by brushing away any loose debris like dust, dirt or cobwebs. If you want to use a stencil or painter’s tape to create specific shapes or edges, attach it to the surface so that it won’t shift around during your painting process.
It’s time to paint! Use your brush to paint your moss mixture onto the surface. Try to create an even coat.
Once you’re finished painting, it’s time to wait. Depending on the type of moss and the conditions, it might take as long as 4 to 6 weeks for the moss to grow. To promote quicker growth, mist once a week with water until you see sprouts appear.
Now you have a unique piece of art that will bring life into any space. The possibilities are endless in terms of design, so get creative and enjoy all the benefits of this beautiful eco-friendly art trend all on your own.

Ignacio Arteaga. Trusted real estate professional with 30 Years of experience
With Three decades of full time experience in the real estate industry, I have helped Countless sellers, Buyers, and investors achieve their goals. My deep market knowledge, strong negotiation skills, and commitment to exceptional service set me a part in an ever-changing industry. Whether you're looking to buy by your dream home, sell your property for top dollar, or make a smart investment. I provide expert guidance on every step of the way. allow me to turn your real estate goals in to reality!